
1. Game Overview
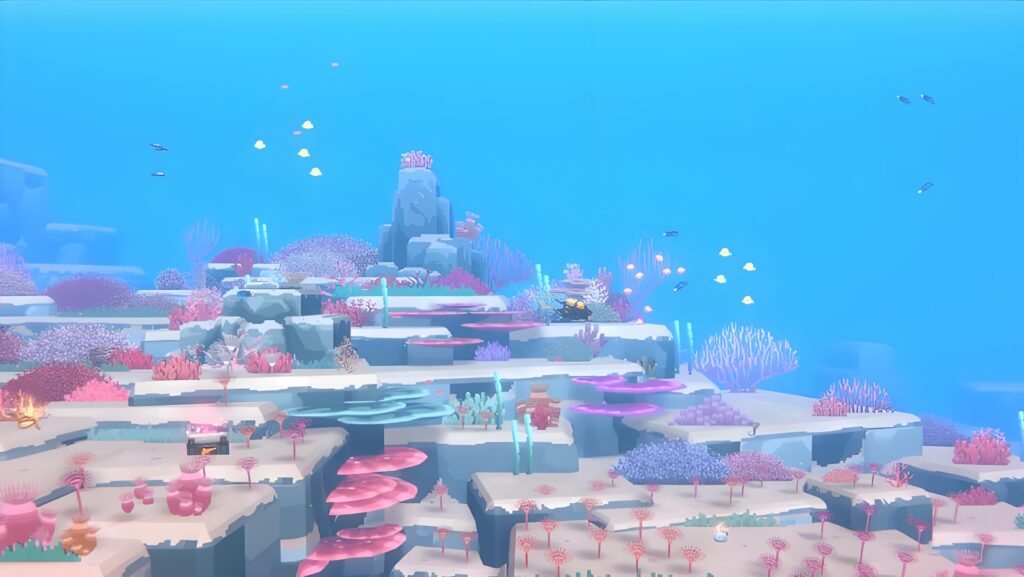
Dave the Diver is MINTROCKET’s wildly charming mashup of deep-sea diving and sushi restaurant sim. You play as Dave — a stocky diver who spends his days plunging into the Giant Blue Hole to hunt fish, tangle with sea monsters, and root out ancient mysteries. Come nightfall, that same fresh catch goes straight onto the menu at Bancho Sushi, where you’re the one taking orders and keeping customers happy.
| Feature | Description |
| Blue Hole Exploration | Each dive features a randomly generated map with treasures, ruins, and exotic sea life |
| Sushi Restaurant | Cook caught fish into dishes, hire staff, and expand Bancho Sushi into a culinary empire |
| Boss Fights | Take on massive underwater bosses — from the Giant Squid to the Kronosaurus |
| Story & Lore | Uncover the secrets of the Sea People and a hidden ancient civilization beneath the waves |
| �� Dave the Diver sits at Overwhelmingly Positive on Steam for a reason. Don’t rush the main story — the writing genuinely earns its ending. |
2. Beginner’s Guide
Time Management
- Each day is split into three chunks: Morning, Afternoon, and Night.
- You have two dive windows (morning and afternoon). The map reshuffles each time, so no two dives are identical.
- Night diving opens up later in the story, but it eats into your restaurant shift and the deep gets nastier after dark — probably not worth it early on.
- On Day 1 specifically, there’s no catch quota — feel free to ignore fish entirely and just scout the layout and grab materials.
Priority Upgrades
| Upgrade | Priority | Reason |
| Oxygen Tank | ★★★ Highest | More dive time = more fish and resources |
| Weight Limit | ★★★ Highest | Carry more fish per dive, directly boosts revenue |
| Diving Suit | ★★ As needed | Upgrade when the main story requires deeper dives |
| Weapons | ★★ Mid-game | Focus on after meeting story needs |
Core Mechanics to Know
- Sprinting burns oxygen fast — save it for when you actually need to bolt.
- Getting hit also knocks oxygen off the bar, so getting mobbed by a group of enemies is a very fast way to end a dive early.
- After Duff’s Weaponsmith quest goes live, weapon crates start showing up on every dive. Pop every single one — you’d be surprised what turns up.
- Fish go into your inventory and get tallied once you surface — nothing is lost mid-dive.
- The game auto-saves three times a day, but after a tough boss fight it’s smart to hit manual save just to be safe.
Day 1 Opening Strategy
- Resist the urge to fish right away. Spend Day 1 scouring the map for blue shells, brown shells, wood, and copper ore — shoot for around 99 of each.
- Head to the far right first to grab the silver plate — you’ll need it for a trade with the scarred man later.
- Day 1 only throws Lionfish at you, which makes it the perfect low-pressure environment to get a feel for the controls.
- Give Pufferfish a wide berth. Their inflated body is literally unhittable, and the poison they leave behind chews through your oxygen bar at an alarming rate.
| ⚠️ Seriously — stay out of the Deep Zone until you’re geared for it. The creatures down there will eat you alive, and you’ll just end up surfacing with an empty inventory and wasted dive time. |
3. Main Story Walkthrough
The game runs through a prologue, seven chapters, and an epilogue. Each section opens up new zones and mechanics at a pretty satisfying pace.
[Prologue] A Sushi Bar by the Blue Hole
- Grab your harpoon and reel in 7 fish of any kind for Bancho — the species doesn’t matter here.
- During the sushi prep mini-game, keep an eye on the wasabi gauge on the right. Overfill it and you’ll blow the dish.
- Scrape together 100 gold for the repair fee, and while you’re at it grab rope and scrap metal — that’s what opens up Duff’s Weapon Shop.
[Chapter 1] Traces of the Sea People ⚔ BOSS: Giant Squid
- First order of business: upgrade your Oxygen Tank. Then head into the Blue Hole and start hunting for Sea People relics.
- Once you wrap the quest, recruit Fangwei. That’s what flips the switch on the staff hiring system.
- Giant Squid: Cut through the hull with the cutting machine to get inside. Hit the eye twice to kick off Phase 2, then weave through tentacle swipes and ink shots — two more clean hits and it’s done.
[Chapter 2] Into the Deep ⚔ BOSS: Wolf Eel
- Track down the Language Decoder so you can actually talk to the Sea People.
- Cook up some Coral Porridge as a peace offering — the Sea People appreciate the gesture.
- Guide Princess Ramo through the deep-sea corridor — it’s no leisurely swim.
- Wolf Eel: The ship anchor QTE hits like a truck — make good use of it. Between anchor triggers, wait out its lunges and slot your shots into the openings.
- Optional Boss — Clione Queen: Encountered during a side quest in this chapter.
[Chapter 3] A Request from the Sea People
- The whole point of this chapter is grinding the Sea People’s Trust Level up to 100 through their village quests.
- Best trust gains per quest: Deliver Lunch Box (+10), Catch a Sea Angel (+15), Gather Seaweed (+25), Retrieve Ball (+20). Prioritize these.
- Hit 100 trust and go talk to Village Chief Tiakng — that’s what moves things forward.
- Optional Bosses: Truck Hermit Crab and Goblin Shark.
[Chapter 4] Abandoned Cave ⚔ BOSS: John Watson 2.0
- Stop by the Village Chief’s house first, then go find the Abandoned Cave entrance.
- Puzzle hint: rearrange the floor rocks to mirror the wall mural pattern — get it right and the key drops.
- The moment you snag the key the whole cave starts shifting around you. Follow the marked path out and watch for Sea People patrols and wooden spikes along the way.
- John Watson 2.0: Read the missile flight paths, dodge, and punish during the brief window after each volley.
- Optional Boss: Mantis Shrimp (encountered via side quest).
[Chapter 5] Frozen Passage ⚔ BOSS: Giant Gadon
- Head into the new Glacial Area and pick up the Ice Gun while you’re there.
- The statue puzzles here revolve around swapping positions and using one statue to block another’s line of sight — think it through before you start shoving things around.
- Giant Gadon: Learn its wind-up animations and use the Ice Gun freeze to dictate the pace of the fight rather than letting it dictate yours.
[Chapter 6] Melting Glacier ⚔ BOSS Chain
- This chapter has you night-diving into SeaBlue’s base — the game briefly goes stealth here, which is a nice change of pace.
- On a stormy night you can stumble into the optional Peacock Mantis Shrimp — one of the nastier hidden bosses in the game.
- Boss gauntlet incoming: White Whale, then Helicoprion, then Kronosaurus. Load up on ammo before you walk through that door.
- Also encounter the Phantom Jellyfish in this chapter.
[Chapter 7] Broken Control Room ⚔ Final BOSS: Yawie
- Use the black beetles to seal off the toxic gas vents so you can push further into the Control Room.
- Yawie is the final boss — and honestly the toughest fight in the whole game. Learn its phases before going in, and make absolutely sure you’re topped off on health and ammo.
4. Fishing Tips & Techniques
Star Rating System
Star rating comes down to how clean the capture is. Wound the fish and the rating drops; take it alive with zero damage and you land a 3-star — the only kind worth using for premium dishes.
| Tool | Purpose | Notes |
| Harpoon | Standard fishing | Highest meat yield per fish, but damages star rating |
| Net Gun / Steel Net Gun | Live capture | Best way to guarantee 3-star catches |
| Hush Dart | Tranquilize & capture live | Top-tier 3-star farming tool; use it liberally |
| Gloves | Pick up creatures | Required for Sea Urchins & Crabs (unlocked mid-story) |
| Bug Net | Catch small creatures | Needed for Sea Angels, Sea Horses, & Shrimp (side quest unlock) |
| Sensor Fish Net | Lure & trap | The only way to obtain 3-star Crabs |
Special Catch Tips
- Wolf Eel: Spends the day wedged inside rock crevices. If you want it swimming in the open, come back at night.
- Some creatures — rare Sea Horse variants, Jellyfish, Sea Grapes — only show up inside the Stalactite Cave, nowhere else.
- Pufferfish: Net Gun only. Don’t get close — the poison will gut your oxygen faster than almost anything in the game.
- Deep-sea fish become accessible once you upgrade your diving suit, and they fetch significantly higher prices on the menu.
Efficient Dive Routing
- Grab your resource haul before you start fishing — otherwise shells and ores crowd out space you need for the actual catch.
- In the early game your weight limit is tight, so large fish just aren’t worth chasing yet — leave them for later.
- Go into every dive with a single focus — a specific quest fish, a high-value target species, or a pure resource run. Trying to do everything at once usually means doing nothing well.
| �� The Stalactite Cave resets its rare spawns every single dive. It’s hands-down the best source of exotic ingredients — make it a regular stop. |
5. Bancho Sushi Management
Core Service Tips
- Tea first, orders second. Guests who’ve had their tea are more patient and far less likely to walk out on you.
- The moment a dish hits the pass, get it to the table. Letting plates pile up is how you lose customers mid-meal.
- Fast table turns = more covers per shift. Keep the floor moving.
- Once you have staff, hand the floor over to them and shift Dave into more of a management role.
Recipe Upgrade System
Every time you collect 3 portions of the same fish meat, that dish levels up — higher price, happier customers. Focus upgrades on whatever your regulars order most.
| Game Stage | Recommended Dishes | Reason |
| Early Game | Basic Fish Sushi | Easy ingredients, high demand volume |
| Mid Game | Deluxe Sushi Combo | High revenue per table, boosts per-shift earnings |
| Late Game | Crimson Roll | Massive profit margins; double price during special events |
Restaurant Expansion Timeline
- The moment you can afford it, expand seating. More tables is more money per shift, full stop.
- When the fish farm comes online, start farming the fish you burn through fastest — it cuts down how much pressure each dive has to carry.
- The vegetable garden — unlocked through Otto — grows your own condiments, which quietly shaves a decent chunk off ingredient costs.
- Special event days flip prices to double — triggered by story beats, so watch for them and stockpile your best dishes ahead of time.
| ⚠️ Night diving cuts into your restaurant hours. If you’re going for a big earning night, just skip the dive and stay on the floor. |
6. Staff System
Your staff pretty much make or break Bancho Sushi. Everyone picks up their first skill at Level 3, their second at Level 7, and tops out at Level 20.
Recommended Staff Lineup
| Staff | Role | Key Abilities | Notes |
| Drae | Manager | Level 10: Full recipe mastery; Level 15: Signature dish “Ice Fish Curry” | Top-tier manager pick |
| Raul | Kitchen | Raises drink prices; occasionally saves expensive ingredients | Excellent ROI chef |
| Davina | Dispatch | 800+ Procurement & Charm; brings back huge hauls of condiments | Best dispatch unit in the game |
| El Nino | Front of House | Cleaning + Serving combo | Service powerhouse (986 Service stat) |
| Itsuki | Front of House | Irresistible Charm + Drink Service | Highest Charm stat (963) |
| Billy | Server | All-rounder; consistently earns tips | Best generalist server |
| Maki | Chef | Cooking+ & Cooking++ skills | Highest Cooking stat (1055) |
| Yone | Chef | High raw Cooking stat | Reliable kitchen mainstay |
Staff Development Tips
- Push your four core staff members to Level 3 as quickly as you can — that first skill unlock makes a tangible difference right away.
- Idle staff sitting at the restaurant doing nothing is wasted potential. If they’re not on the floor, they should be out on dispatch.
- By mid-to-late game, the real priority is getting your key staff to Level 7. The second skill is where you start feeling the difference.
| �� Davina is the undisputed queen of dispatch. Her Procurement & Charm numbers are so far above everyone else that she practically fills the pantry by herself — there’s really no competition for that slot. |
7. Weapons Guide
Dave the Diver has 8 weapon types. Most can be kitted out with elemental upgrades — Poison, Flame, Lightning, Shock, or Ice — but you’ll need blueprints to craft anything beyond the starter gear.
| Weapon | Characteristics | Best Use |
| Basic Underwater Rifle | Starter weapon, precise single shots | All-purpose, early-game staple |
| Triple Axel | 3-shot spread, high close-range DPS | Close quarters, crowd control |
| Red Sniper Rifle | High single-target damage, long range | Precision kills, boss weak spots |
| Grenade Launcher | Area-of-effect explosive damage | Groups of enemies, AOE output |
| Sticky Bomb Gun | Bombs adhere before detonating | Boss DPS, strategic placement |
| Net Gun / Steel Net Gun | No-damage live capture | Farming 3-star fish |
| Hush Dart | Tranquilizer; stuns for live capture | 3-star hunting, crowd control |
| Ice Gun | Freeze effect; unlocked in Glacial Area | Glacial Area combat, slowing enemies |
Element Attribute Recommendations
- Poison deals damage over time, which makes it particularly nasty against big slow targets like deep-sea bosses.
- Shock briefly locks an enemy in place — great for creating a consistent damage window on fast or erratic targets.
- Flame deals burning AoE damage, which tears through groups of enemies bunched together.
- Once you hit mid-to-late game, the Red Sniper Rifle fully upgraded into the Death Sniper Rifle — or a maxed Grenade Launcher — are your go-to boss killers.
| �� After Duff’s shop opens, weapon crates start populating every dive. Never walk past one — weapons and upgrade materials are your fastest route to a power spike. |
8. Money-Making Tips
Stage-by-Stage Strategy
| Stage | Best Strategy | Key Notes |
| Early Game (Prologue – Ch.2) | Farm and sell Sea Angels & Sea Horses; sell surplus fish directly | Don’t waste ingredients — use everything in the restaurant |
| Mid Game (Ch.3 – Ch.5) | Push the “Deluxe Sushi Combo”; expand the fish farm | Level Drae to 10 for full recipe access |
| Late Game (Ch.6 – Ch.7) | Spam “Crimson Rolls”; maximize special-event double-price nights | Pre-stockpile ingredients before event days |
Iron Ore & Resource Locations
- Iron Ore shows up reliably throughout the Shallows to Medium Depths (50-130m) in the Blue Hole.
- For the densest concentrations, check near the Stalactite Cave entrance and the cluster below-right of where you first enter the water.
- Copper Ore is farmable right from Day 1 — a typical run across the map nets you around 12 pieces.
Other Income Boosts
- The cat hanging around near the boat is easy to overlook, but feed it every day and you’ll eventually unlock a surprisingly touching family storyline with some bonus rewards attached.
- Legendary fish are worth way too much to throw into a standard dish. Hold onto them for VIP guests or special event nights when prices are at their peak.
- Service speed and tips are directly linked — level up your floor staff and you’ll notice the per-shift income climbing.
9. Secrets & Side Quests
Charms Collection
| Charm | Effect | How to Obtain |
| Dolphin Necklace | Sprint speed +30% | Defeat pirates 3 times |
| Octopus Pendant | Gun damage +15% | Complete the “Chase the Octopus” side quest in Chapter 2 |
| Eco Bracelet Series | Damage reduction / Poison resist / More mineral drops | Level up the Eco Inspector reputation |
| Sea People Necklace | Access pass to the Sea Worm Tunnel | Hand it to Chief Tiakng after Chapter 4 |
Notable Side Quests
- Dr. Bacon’s archaeology quest unlocks on Day 3. Finish it and he drops off the Radar the following day — genuinely changes how map exploration feels.
- Sea Angel Capture: You need the Bug Net from the side quest before you can grab them. Once you have it, Sea Angels are one of the more valuable ingredients you can farm.
- Jakeum’s Book is at the Sea People Temple — pick the rightmost of the three books on the shelf.
- Feed the Cat every single day — it takes a while but eventually triggers the “A Family of Three” storyline, which is genuinely worth seeing.
Saving & Checkpoints
- The game auto-saves three times a day: morning, afternoon, and night.
- After any boss kill, hit the manual save. Don’t rely on the auto-save to catch it.
- Heads up — there’s a known quirk where diving at night and then immediately opening the restaurant can occasionally trigger a rollback to a pre-boss save state. Manual save eliminates the risk.
10. Redeem Codes
To redeem: open your Phone in-game, go to Call → Consultant, then hit “Reward Code” and type in the code. Capitalisation doesn’t matter.
| Code | Reward | How / Where to Find |
| SEABLUEFOREVER | SeaBlue Boat Skin | Left side of the sunken submarine near the Dunkleosteus control room entrance |
| 5656DRAGON | Kronosaurus Boat Skin | Found as a serial number in an in-game magazine |
| 4TWRS | Manbo Air Poster (Decoration) | Manbo Air in-game email (Sept 25) |
| SEAPEOPLE | Sea People Stone Tablet (Decoration) | Sea People Archive Room at 100m — top of right stone pillar |
| EASTEREGG | Rooster Weathervane (Farm Decoration) | Behind the chicken coop at the farm |
| GREATKINGLONG | Golden Dragon Statue (Decoration) | Bookshelf right of the Great Dragon Temple in the Sea People village |
| YOUTOOZDAVE | Dave Plush Doll (Decoration) | Linked to the Dave the Diver plush on youtooz.com |