
Ⅰ:Game Core Setting and Basic Information
Developed by Housemarque, “Saros” is a PS5 exclusive third-person shooter. A spiritual successor to “Returnal”, it blends Roguelike (multi-form) and space horror gunfight elements, with core gameplay revolving around “risk and reward.” Players will take on the role of Aguirre de Villagi, a member of the Fourth Colonization Team, venturing to the alien planet Calcosa to investigate the mysteries of previous colonization teams’ disappearances. On this ever-changing planet, players will battle mechanical monsters. This guide focuses on key gameplay elements to help players quickly get started and overcome various challenges.
1.Core Worldview and Gameplay Positioning:
The alien planet Kalkosa harbors valuable “Lucenite” resources, attracting the attention of the Sordarjee Corporation. However, multiple colonization teams have mysteriously lost contact on this planet, and the player’s core mission is to uncover the truth behind this. The planet’s terrain changes randomly with each exploration, making it a “multi-form” shooter that balances narrative exploration with hardcore bullet hell gameplay. A single exploration session lasts no more than 30 minutes, and players can teleport directly from their base to unlocked biomes, eliminating the need to revisit previously explored maps.
The game retains a hardcore challenge while optimizing the experience for new players. It features an auto-save function, multiple save slots, and a “Kalkosa Editor” for flexible difficulty adjustments.
- Basic Controls and Core Mechanics:
The basic core controls include Jump, Dash, Shoot, Soltari Shield, Weapon Switch, and Ally Interaction. The game supports the PS5 DualSense controller’s adaptive trigger function; half-pressing the trigger activates the weapon’s Alternative Fire Mode, while full-pressing activates Normal Fire. The controls are smooth and provide distinct feedback.
Core Mechanics Explained:
① Soltari Shield: As a core defensive item, pressing the corresponding button generates a blue spherical shield. This shield not only blocks enemy damage but also absorbs projectiles of the same color. When a certain amount of projectiles are absorbed, a Power Missile can be launched as a counterattack. Precise control of the shield’s duration is crucial to avoid failure due to carelessness.
② Barrage Ballet Combat: Enemies are primarily mechanical monsters adept at unleashing dense projectiles. The core of the battle lies in “active movement + precise dodging,” rather than simply avoiding attacks. Players must learn to counter enemy projectiles, combining this with Soltari Shield absorption for integrated offense and defense.
③ Cycle and Growth Mechanism: After a failed challenge, the map resets, but unlocked Permanent Upgrades at the base are retained. Weapons and upgrades are randomly generated each round of exploration, and many upgrade items have double-edged sword properties, requiring careful selection.
- Resource and Growth System:
The core resource is Lucenite, which can be obtained by defeating enemies and exploring the map. It is mainly used to unlock Permanent Upgrades for the base, which are key to overcoming the game’s difficulty in the later stages. The growth system is divided into two main directions—Core Bonuses (such as unlocking “Second Chance”) and Basic Attribute Enhancement. Weapon types include Hand Cannons, Rifles, Shotguns, etc and each type of weapon has its own Alternative Fire Mode. No need to deliberately grind for monsters; these weapons can be gradually unlocked and strengthened as exploration progresses.
Ⅱ:Game Walkthrough
The game’s overall flow revolves around “exploring ecological domains → defeating regional bosses → unlocking new areas → advancing the story.” Each exploration round is fast-paced, and focusing on the following key points will allow for efficient progress:
1. Early Stage: Beginner Adaptation and Basic Unlocking (1-3 Rounds of Exploration)
① The game starts with a “scripted” boss battle. Don’t worry about winning or losing; focus on familiarizing yourself with the Soltari Shield, bullet dodging, and weapon handling to master the basic combat rhythm.
② Prioritize exploring the initial ecosystem to collect Lucenite resources and unlock your first Permanent Upgrade. It’s recommended to prioritize “Shield Capacity Increase” or “Basic Weapon Damage Boost” to reduce the difficulty of subsequent explorations.
③ Familiarize yourself with the map’s mechanics. Use the guide markers to find hidden Lucenites. Keep each exploration round under 20-30 minutes to avoid excessive energy expenditure. After each failure, summarize your bullet dodging techniques.
2. Mid-Game: Ecosystem Exploration and Boss Breakthrough (4-8 Rounds of Exploration)
① Gradually unlock various ecosystems in Kalkosa. Enemy types and bullet patterns differ in different areas, requiring flexible adjustments to combat strategies (e.g., melee shots are suitable for narrow areas, while rifles are better for open terrain).
② After unlocking the “Kalkosa Editor,” you can adjust the challenge difficulty according to your skill level. Those aiming for higher rewards can increase the challenge level, while beginners can lower the difficulty for a steady progression.
③ Focus on defeating regional bosses (such as the first key boss, “Oracle”) to unlock new weapons and permanent upgrades, advance the story, and gradually uncover the truth behind the colony’s disappearance.
④ Note: Weapons and upgrades are randomly generated in each round of exploration. Prioritize upgrades like “Soltari Shield Absorption Efficiency Increase” and “Power Missile Damage Boost,” avoiding negative upgrades like “Damage Boost but Shield Weakening.”
3. Late Game: Ultimate Enhancement and Final Challenge (9 rounds or more)
① Collect enough Lucenite to unlock core Permanent Upgrades, Second Chance, and Ultimate Weapon Enhancement. Optimize your combat setup and combine weapons and enhancements to suit your playstyle.
② Venture deeper into the Calcosa region to face denser bullet patterns and more powerful Elite Monsters. Master the “Soltari Shield Absorption → Power Missile Counterattack → Precise Dodge” cyclical combat pattern.
③ Challenge the final boss. Utilize the combat skills learned earlier, focusing on avoiding Full-Screen AOE Barrage. Use the Soltari Shield to absorb boss bullets for counterattacks, gradually depleting the boss’s health to complete the final story.
Ⅲ:Core combat skills
1. General Combat Techniques
①Prioritize Movement: With limited cover on the map, move quickly in open areas, utilizing the invincibility frames of the Dash to avoid dense bullet patterns. Avoid staying in one place.
②Soltari Shield Usage: The shield doesn’t need to be active constantly. Only activate it when facing dense bullet patterns or when you need to absorb bullets to recharge. Precisely control its duration to prevent being focused down by the enemy after it disappears.
③Weapon Switching Strategy: Switch weapons flexibly according to the terrain—use Rifles for long-range harassment in open terrain, Shotguns for close-quarters combat in narrow terrain, and Hand Cannons as a backup weapon for unexpected situations.
④Precise Reload: Input commands at the optimal time for Manual Quick Reload to improve combat fluidity and gain additional damage, avoiding enemy attacks during reload intervals.
2. Key Boss Strategies
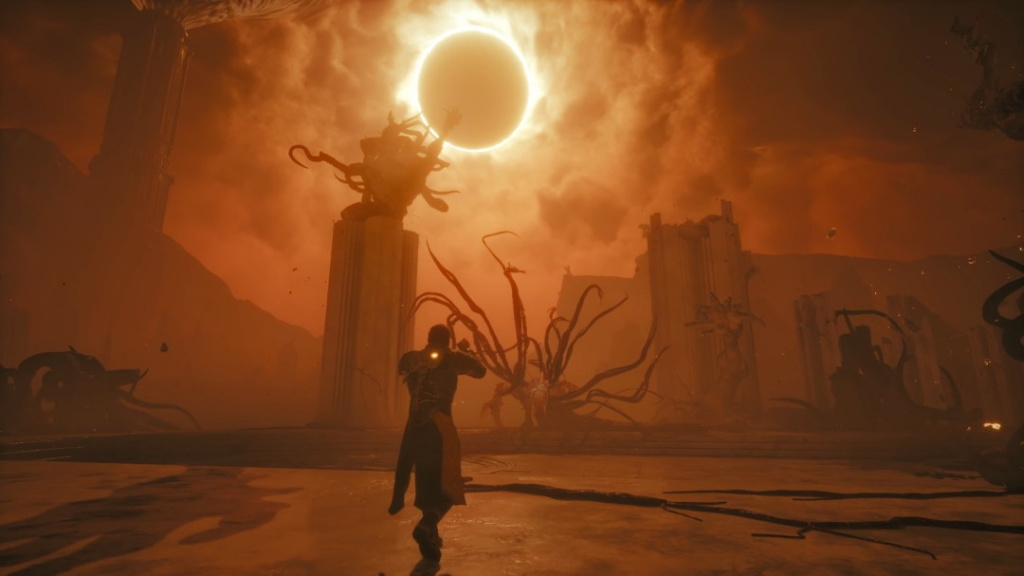
①Oracle (First Key Boss): Appears as a plant. Its core attack method involves launching projectiles from glowing growths on its sides. Prioritize using the Auto-Lock Weapon to attack the growths, avoiding the boss’s Full-Screen Shockwave Damage. Use the Soltari Shield to absorb its blue projectiles, then charge it up and launch Power Missiles to quickly deplete its health. No need for a direct confrontation.
②Mechanical Elite Boss: Huge in size, with dense projectiles and a wide attack range. Use Dash to get behind the boss and attack its weak points. Use the Soltari Shield to absorb its projectiles and charge it up. Prioritize Power Missiles on the boss’s weak points to avoid direct damage.
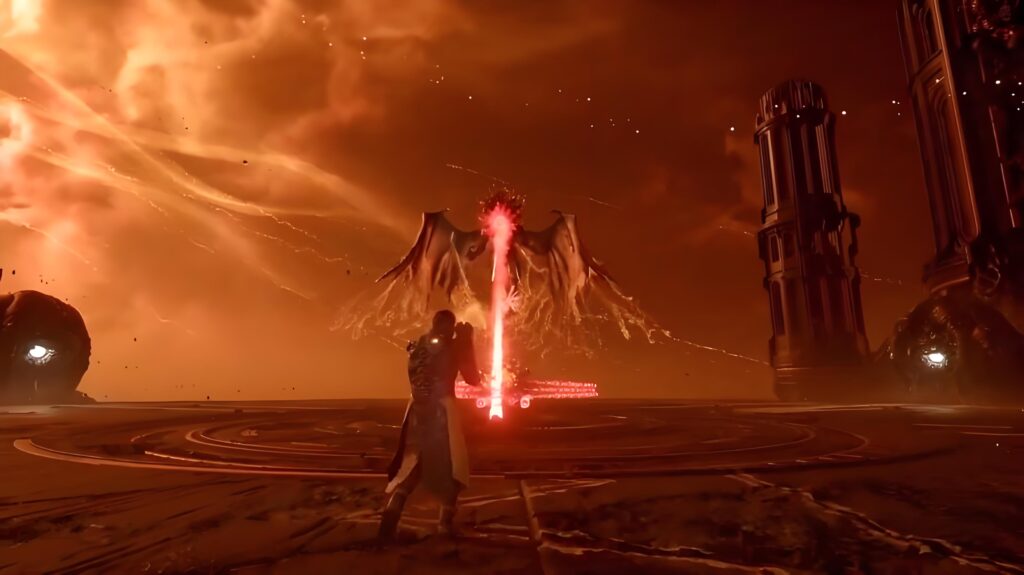
③Final Boss: The battle is divided into two phases. The first phase mainly involves projectile attacks; focus on avoiding the Full-Screen AOE Damage and use the Soltari Shield to counter. In the second phase, the boss will release a Vampire Skill. Use Second Chance to tank damage and concentrate fire on the boss’s weak points, combined with Power Missiles. Missile burst damage.